HOW TO: DIY Musical Greeting Card
Using musical greeting cards is a special way to celebrate and share your feelings for your loved ones. But sometimes we want something different, something unique. So let's spend some time to design it ourselves! In this tutorial we will show you 2 tips that will help you design your very own greeting card.
Tip 1
Greeting cards are meant to be special, and we always want to put our feelings into words. However, if we only use pen to write the words themselves, that's too boring. There are a lot of ways to make it more interesting!
What You Will Need
- Pencil
- Colour Marker
- Blank Greeting Card
Handwritten 3D Letter
So let's begin with writing the letter, use a pencil first to write the letter, increase the thickness and erase the letter inside, then add a shadow to it by choosing 2 connected sides of the letter, for example, left and lower sides. Now you create a 3D letter!
You also can make an outline to a word or a sentence, and then create the shadow to the outlined shape.
After you are familiar with doing the shadow, you can add colour to the letter or the shadow, both works really well.
When you are adding colours, don't just paint the whole letter with one colour, you can leave some space inside. Just like how you are making different shapes, you can also do stripes with 2 or more colours.
Doodling
A lot of people don't think that they can draw like an artist. That's ok, do some doodling.
When writing the letter in the greeting card, you can always replace a word with a doodle object to make reading the letter entertaining.
What You Will Need
- Colors!
- Imagination!
- Enough time for fun!
Tip 2
Some people think they cannot draw beautifully, and they don't have good hand writing skills, here comes the second tip, Be prepared!
What You Will Need
- Coloured papers
- Pencil
- Double sided tape
- Scissor
- Cutter
- Foam tape
- Cutting board
Layered gradient paper-cut
Firstly, choose a light colour paper. Then pick some darker version of it. For example, from a light green to a darker green. Use more than 3 pieces to make better a stronger gradient.
Note: More paper means thicker, if you want to put it on the inside of the card, make sure you don't put too many layers, since it might not close properly.
Take the lightest color and randomly draw a shape. Use the cutter carefully and cut out the shape. Now with the frame and shape you can put the frame on the next lightest colour paper. Draw a smaller version of the same shape, cut out and repeat these steps.
For the frame: put the darkest colour at the bottom and lightest on top, use foam tape to create space between each paper and stick them together.
For the shape: put the lightest colour at the bottom, since it's the largest, and darkest on top, use foam tape to stick them together.
You can explore with more shapes like moons, stars, hearts, etc...
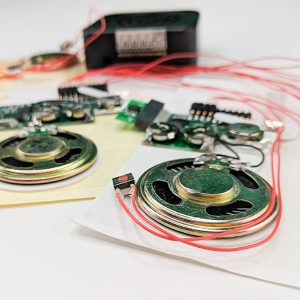
We sell black and white blank versions of recordable greeting cards. We also sell the sound modules separately in case you have your own DIY project that you'd like to add sound into.
Think creatively, make your own DIY music greeting card now!
Video Example
Shop our already completed cards
Check out our completed cards, designed all in-house by our team!


